Sunday, February 17, 2013

Art piece from fabric and wood

Sometimes I buy things for a specific purpose, and then use them for something entirely different. Perfect example of this was the fabric I bought recently. When I saw it, I thought it would go nicely with the blue color scheme I have going on in my bedroom, and I had a few extra throw pillows that needed covers, so naturally, I purchased the fabric with the intention of making pillow covers (and keeping up the pillow theme of this blog so far). When I put the fabric on my bed, I just didn't like the way it looked with my duvet cover. I just couldn't get into it. Well, it was a yard of fabric that would go to waste, so that definitely couldn't happen.

Then I saw the piece of wood I got for free from work which I had yet to do anything with, and inspiration struck. I decided that the fabric would be an art piece in my bedroom. 

I used a staple gun to staple the fabric to the wood to make it look like a canvas painting. The fabric was a very tight fit, but that's what happens when projects come up without you planning for them, right? 

If you're planning on doing this, I recommend measuring your wood and getting fabric about an inch to two inches more than the wood so you can pull it over the wood comfortably. This project was an easy one to begin with, but it would have turned out much better if I had the correct measurements for my fabric. The piece of wood was about 3ft by 3ft. The only downside to this was that the wood wasn't completely flat, so it looks a teensy bit off on my wall, but it was free, so no real complaints from me. In the final product, you can probably see some places where the fabric wasn't stapled completely to the wood, and that's just because there wasn't any to staple. That's my fault. Again, measure your fabric. It'll make your life so much easier. 

Just pull the fabric tightly over the wood, then fold it over to the back, and staple. Put as many staples in as you need to keep the fabric in place. 

Here's the finished product hanging on my wall. I'm still figuring out what to do with the rest of the wall. 

Tuesday, February 5, 2013

Another pillow...

So yeah, I swear this blog won't be all pillows. It's just that I have all this leftover white muslin fabric, and I just happened to be on a pillow making kick when I started this blog. Plus, they're super easy.

I've been wanting to do a flower petal pillow for a while now, but didn't have the felt to do it. I finally made the trip to JoAnn's Fabrics to get some. I ended up getting half a yard of yellow felt and some other printed fabric with the intention of making pillow covers for the pillows I'd be putting in my bedroom.

There are a ton of tutorials for this project, and I actually pinned quite a few of them. The one I ended up going with was one from Burlap + Blue. She actually calls to use normal fabric, rather than felt, but I had already bought the felt and using it allowed me to skip a few steps (namely, sewing each petal, which saved a lot of time). If you do plan on doing this project, I'd probably recommend just a quarter yard of felt, rather than half. I only used about a third of the fabric I had, so I'll have to find some other use for the leftover felt. The middle of the flower was a bit too thick for me to put through the sewing machine, and I hate hot glue for most projects (it just doesn't stay!), so I ended up hand sewing that part.

With cutting, sewing, and stuffing the pillow, I think I spent less than an hour on this project. Very easy. I highly recommend it. Here's my finished product.


Friday, January 18, 2013

Potato Stamp Pillow

You're in for a treat today. I'm about to show you how to make the cheapest, easiest stamp ever. The best part is that you might have already done this years ago.

Do you remember in grade school when you made stamps out of potatoes? If you did, you did more than I did in grade school. Everyone I've shown this project to has mentioned something about Barney, grade school, or activities you did at the age of five. That's okay though, because that means I'm just making up for some lost time, I suppose.

This project really came about because I was trying to grow my own potatoes out of old potatoes that had sprouted in my pantry. That failed so pretty badly, so I had a few small, inedible potatoes to throw away. As fate would have it - just kidding, it was my own laziness because I put off cleaning for Pinterest - I saw this awesome triangle pattern and thought it would look great as a pillow. Rather than going out and buying fabric, I thought it'd be fun to make my own with those old potatoes.

I cut the potatoes in half, then cut a triangle shape into them. I actually had three potatoes to work with, so that gave me a lot of room to mess up, which I did -- a lot. If I could do this project over again, I'd probably have drawn out and measured a triangle to use as a pattern on the potato first. Oh well, you live and you learn. So I ended up with two triangles I liked, and I just picked one.


Making the stamp was honestly the hardest part, and that should tell you something about how easy this project was. After that, I just used some yellow acrylic paint to start the stamping process on my plain muslin fabric (you'll be hearing a lot about that fabric since I have so much of it, by the way) which I cut into the square that would be my pillow. 


Oh, and if I can give you any piece of advice about painting, it would be not to spend money on those artist palettes or mixing trays they sell. They're a total rip off. Just save your old egg cartons. The compartments are perfect for keeping paint colors separate and deeper than the ones most of the mixing tray offer.


After you've chosen your color and poured it, just start stamping. I chose yellow and gray because that's the color palette I'm using for my living room. I was going for a sort of gradient effect with the yellow, so I dipped the stamp in paint, and stamped three triangles. The first one is the most pigmented with paint and the third is the least. Then I put a gray triangle in to end the pattern, and then I start all over again until I fill up the square of the pillow.


Again, there are a few things I would do differently if I could do it over. One of them would be to stamp the triangles more closely together, but that's okay. Another would be to make the surface of my triangle a lot more smooth and level so that those thick lines wouldn't show up on the fabric. I'm still pretty happy with how it came out.

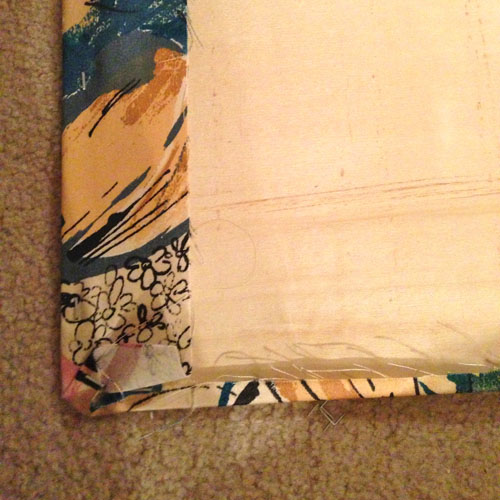
After waiting for the paint to dry, you have to set the paint. To do that with acrylic paint, you can just put a towel over the fabric when the paint is dry, then just run an iron over it for a little bit. If you're using fabric paint, just follow the instructions on the packaging. Then if you're making a pillow like me, you have to sew the two squares of fabric together and leave a little room so you can put the stuffing in, insert the stuffing, then sew the pillow shut.


Here's my finished product. Next to my other finished product. Please excuse my wrinkly couch. As you know, I haven't made zippers for the cushions yet, so that's why they look like that. 

Anyway, I think I'm going to do another pillow with a circle pattern soon. I'll let you know how it goes. 

Wednesday, January 16, 2013

Sparkly Throw Pillow

I'm starting my crafty 2013 off with throw pillows.

I had a lot of leftover white, muslin fabric from my reupholstering adventure, and I had decided a few months ago that it was going to be turned into throw pillows, but I could never muster up the motivation to do it. Turns out, all it took to get started was cleaning out my closet and finding a sparkly skirt that I never wear.


I purchased this skirt on a whim on sale (like I do with all my clothes, let's just be honest here...) from Express last year, I think. I was never able to find a top to wear with it, and the multiple layers made it a weird shape for my body, so sadly, it sat in my closet collecting dust. I decided it was time for my lonely skirt to meet my leftover fabric, and together, they became this awesome pillow.


I cut the sparkly part off into strips, realized it wouldn't be big enough for a full pillow, so I also took the grayish-purple lining to put between the sparkly strips. The fabric is really thin, so I used the muslin fabric as an extra layer so the color looks a lot more vibrant.


The skirt was $10, the muslin fabric was honestly so cheap for the yardage that I can't even remember how much I paid for it, and my friend gave me the stuffing for the pillow. So it was a pretty cheap pillow. Woohoo. 

More on my other pillows later. 

Monday, January 14, 2013

Jumping on the Blog bandwagon


As most of you know, I moved to Dallas in September for a job promotion. Prior to moving here, I lived with my parents for two years, and before that I was a student. So I'll give you a minute to let you guess how much furniture I had to bring with me when I signed my lease for my new grown-up apartment in Dallas.

...

If you guessed zero, you would be wrong. Tricked you. I had two book shelves. :)

Other than that, I had no real furniture. Even the bed that I had for the three years I was in apartments had been given to my younger brother for his apartment. So, I slowly began piecing together all the things that would go into my new apartment. I decided I didn't really want to buy all new things, partly because that costs a lot of money and partly because I enjoy making things.

I bought my couch set and coffee table from a garage sale for $150 and spent about $100 on fabric to reupholster all of it. That was the craziest, most time consuming, most frustrating do it yourself project I've ever done in my life. I'm still not even done because the cushions don't have zippers holding them together, and I've been too lazy to fix that.


A good friend gave me my kitchen table and another book shelf.


My parents gave me a bed frame and mattress set. I made a tree stump end table from a tree stump I got for free from a guy on Craigslist and a tutorial I found on Pinterest.


I've been in my apartment for four months now, and I can confidently say it's more "me" than anywhere I've ever lived, because almost everything in my apartment was either thrifted or made by me. I love being able to walk into stores like West Elm and Anthropologie and not buy anything from them, just get ideas and then go home and make them. I started this blog so that you can join me on my many adventures that start with the simple words, "I bet I could make that." Perhaps I'll inspire you to find some of your own adventures.